 |
| tired and fighting getting sick but the show must go on! |
Sometimes you just have to kick your self into gear lest you miss out on something no short of amazing. Luckily I did just that this past Sunday when I had to drag myself out of bed to head to a
MAC Masterclass being taught by none other than
Romero Jennings.

Anyone worth their beauty lover weight knows who Jennings is but for entertainment purposes lets delve a bit into his background...fluent in Japanese and hailing from Jamaica (I know right?!) this Senior Artist for MAC has been creating beauty with the brand for 21 years and based on what I saw Sunday, he wont be slowing down anytime soon!
 |
| the work of Romero Jennings |
What keeps Jennings with the brand is the importance that they place on "innovation of product" and he believes that we as artists should not take this lightly. We tend to go in with blinders so to speak and have a mental list of the items that need to be re-upped in our kits but according to Jennings we should "always ask whats new."
Though a class dedicated to the art of transformation via drag, it is important to note that all makeup, especially now, contains elements of drag, especially when it comes to highlight and contour, Romero told us that it "is the basis to every makeup" as well as blending and "the difference between a good makeup artist and a great makeup artist is the ability to manipulate". Now I don't know about you, but I am trying to be great out here, so lets get into the class shall we?
 |
| waiting to get our seats |
Class highlights:
- Jennings made his own lashes out of paper specifically for use during class...it took him ten hours...the lashes are one time use only! How giving of his artistic ability, he's the best right?
- SOBO fabric glue and metallic paper from Japan was used to make the lashes themselves but regular DUO lash glue was used to adhere the lashes for the final look
 |
| The paper lashes! |
- He also made brows...no, not just colored the models brows in to match the wig color...he...made...brows...who does that??? for a class? Like really...I love him! The brows were created from the bang that he cut on the wig and placed on a piece of lace/mesh then glued down for the final look which you will see in the pics
- his entire kit is carried in two MAC carry all bags
 |
| Romero Jennings showing us his kit (foundation in Muji container) |
- he uses mostly Matchmaster and Face + Body foundation which he places in the matte Muji containers.
- he does not carry the entire line of foundation. He has the darkest, the lightest and a a few shades in between (pink, yellow, beige), from that he can create what he needs
- he LOVES the prolongwear lip pencils because they last at LEAST 8 hours
 |
| new MAC palettes filled with cream color base and sculpting creams |
MAC Products used during class:
- Prep + Prime powder (loose)
- Acryllic Paint-Orange
- Prep + Prime Moisture Infusion
- 109 brush (moisturizer and foundation application)
- 138 brush (studio fix powder)
- 286 brush (studio fix powder)
- Studio finish concealer
- Studio Finish powder
- Fascinating eye kohl (inner corner of eye, enhance highlight, flare the nostril)
- Frankly Scarlet blush
- Pink Swoon blush
- 222 brush (contour)
- 286 brush (contour)
- Cork shadow
- Brun shadow
- Carbon shadow (contour and on lips, yes on the lips!)
- Blue acryllic paint (shadow base)
- Studio fix NW40
- Nylon shadow (highlight) *also suggested Amber Lights shadow for WOC*
- 227 brush & finger (highlight)
- Prolongwear pencil - In Anticipation
- Coffee liner (lips)
- Coffee Walnut Sculpting Cream
- #33 lashes on bottom
- Funtabulous Dazzleglass
 |
| class haul! |
 |
| before pic of the model |
 |
| did lashes first! |
 |
| applying Prep + Prime loose powder to brows to set |
 |
| getting the brows together with orange acryllic paint and matchmaster foundation |
 |
| applied with a 109 brush, a gel moisturizer followed by foundation keeps client from feeling like they have too much makeup on |
 |
| brows covered, base done, highlight applied |
 |
| time to contour! |
 |
| taking lots and lots of notes! |
 |
| applying MSF Natural |

 |
| perfecting the contour |
 |
adding depth
|
 |
chiseled cheek!

|
 |
| halfway there... |

 |
applying coffee liner to the lips
|
 |
| time to apply bottom lashes |
 |
| brows in place... |
 |
| before and after |
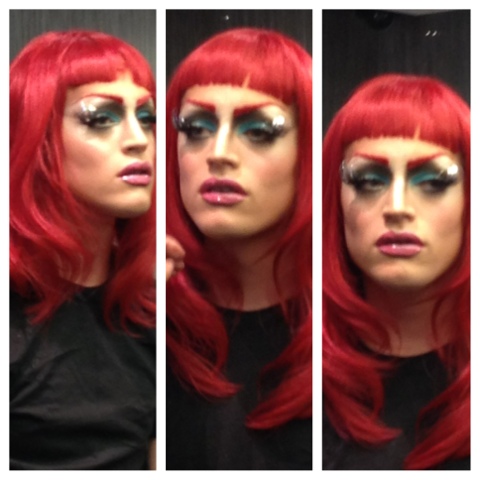 |
the look!
I didnt realize I took so many pictures but hopefully I conveyed what I took away from the class in a way that is helpful. As always if you have any questions please do not hesitate to ask. At some point this week I plan to update this post with a video showing what items I got from the class and explain why I picked the items that I did.
|


Really ultimate. Thanks for sharing the same here.
ReplyDelete